Creating a workflow
Creating a workflow is a four-step wizard. You describe what you want, ZAI drafts the structure, you refine it on the canvas, and submit it for review.
The four steps
Tell ZAI what you want
In the web portal go to Automation & Workflows → Workflows → Add New Workflow. The wizard opens with a chat box.
Describe the workflow in plain English — what systems are involved, what should happen, and what you expect at the end.
"Create a new M365 user, assign them an E3 licence, add them to the All Staff group, and send a welcome email with the temporary password."
Click Generate. ZAI suggests a name, description, and a starting set of steps.
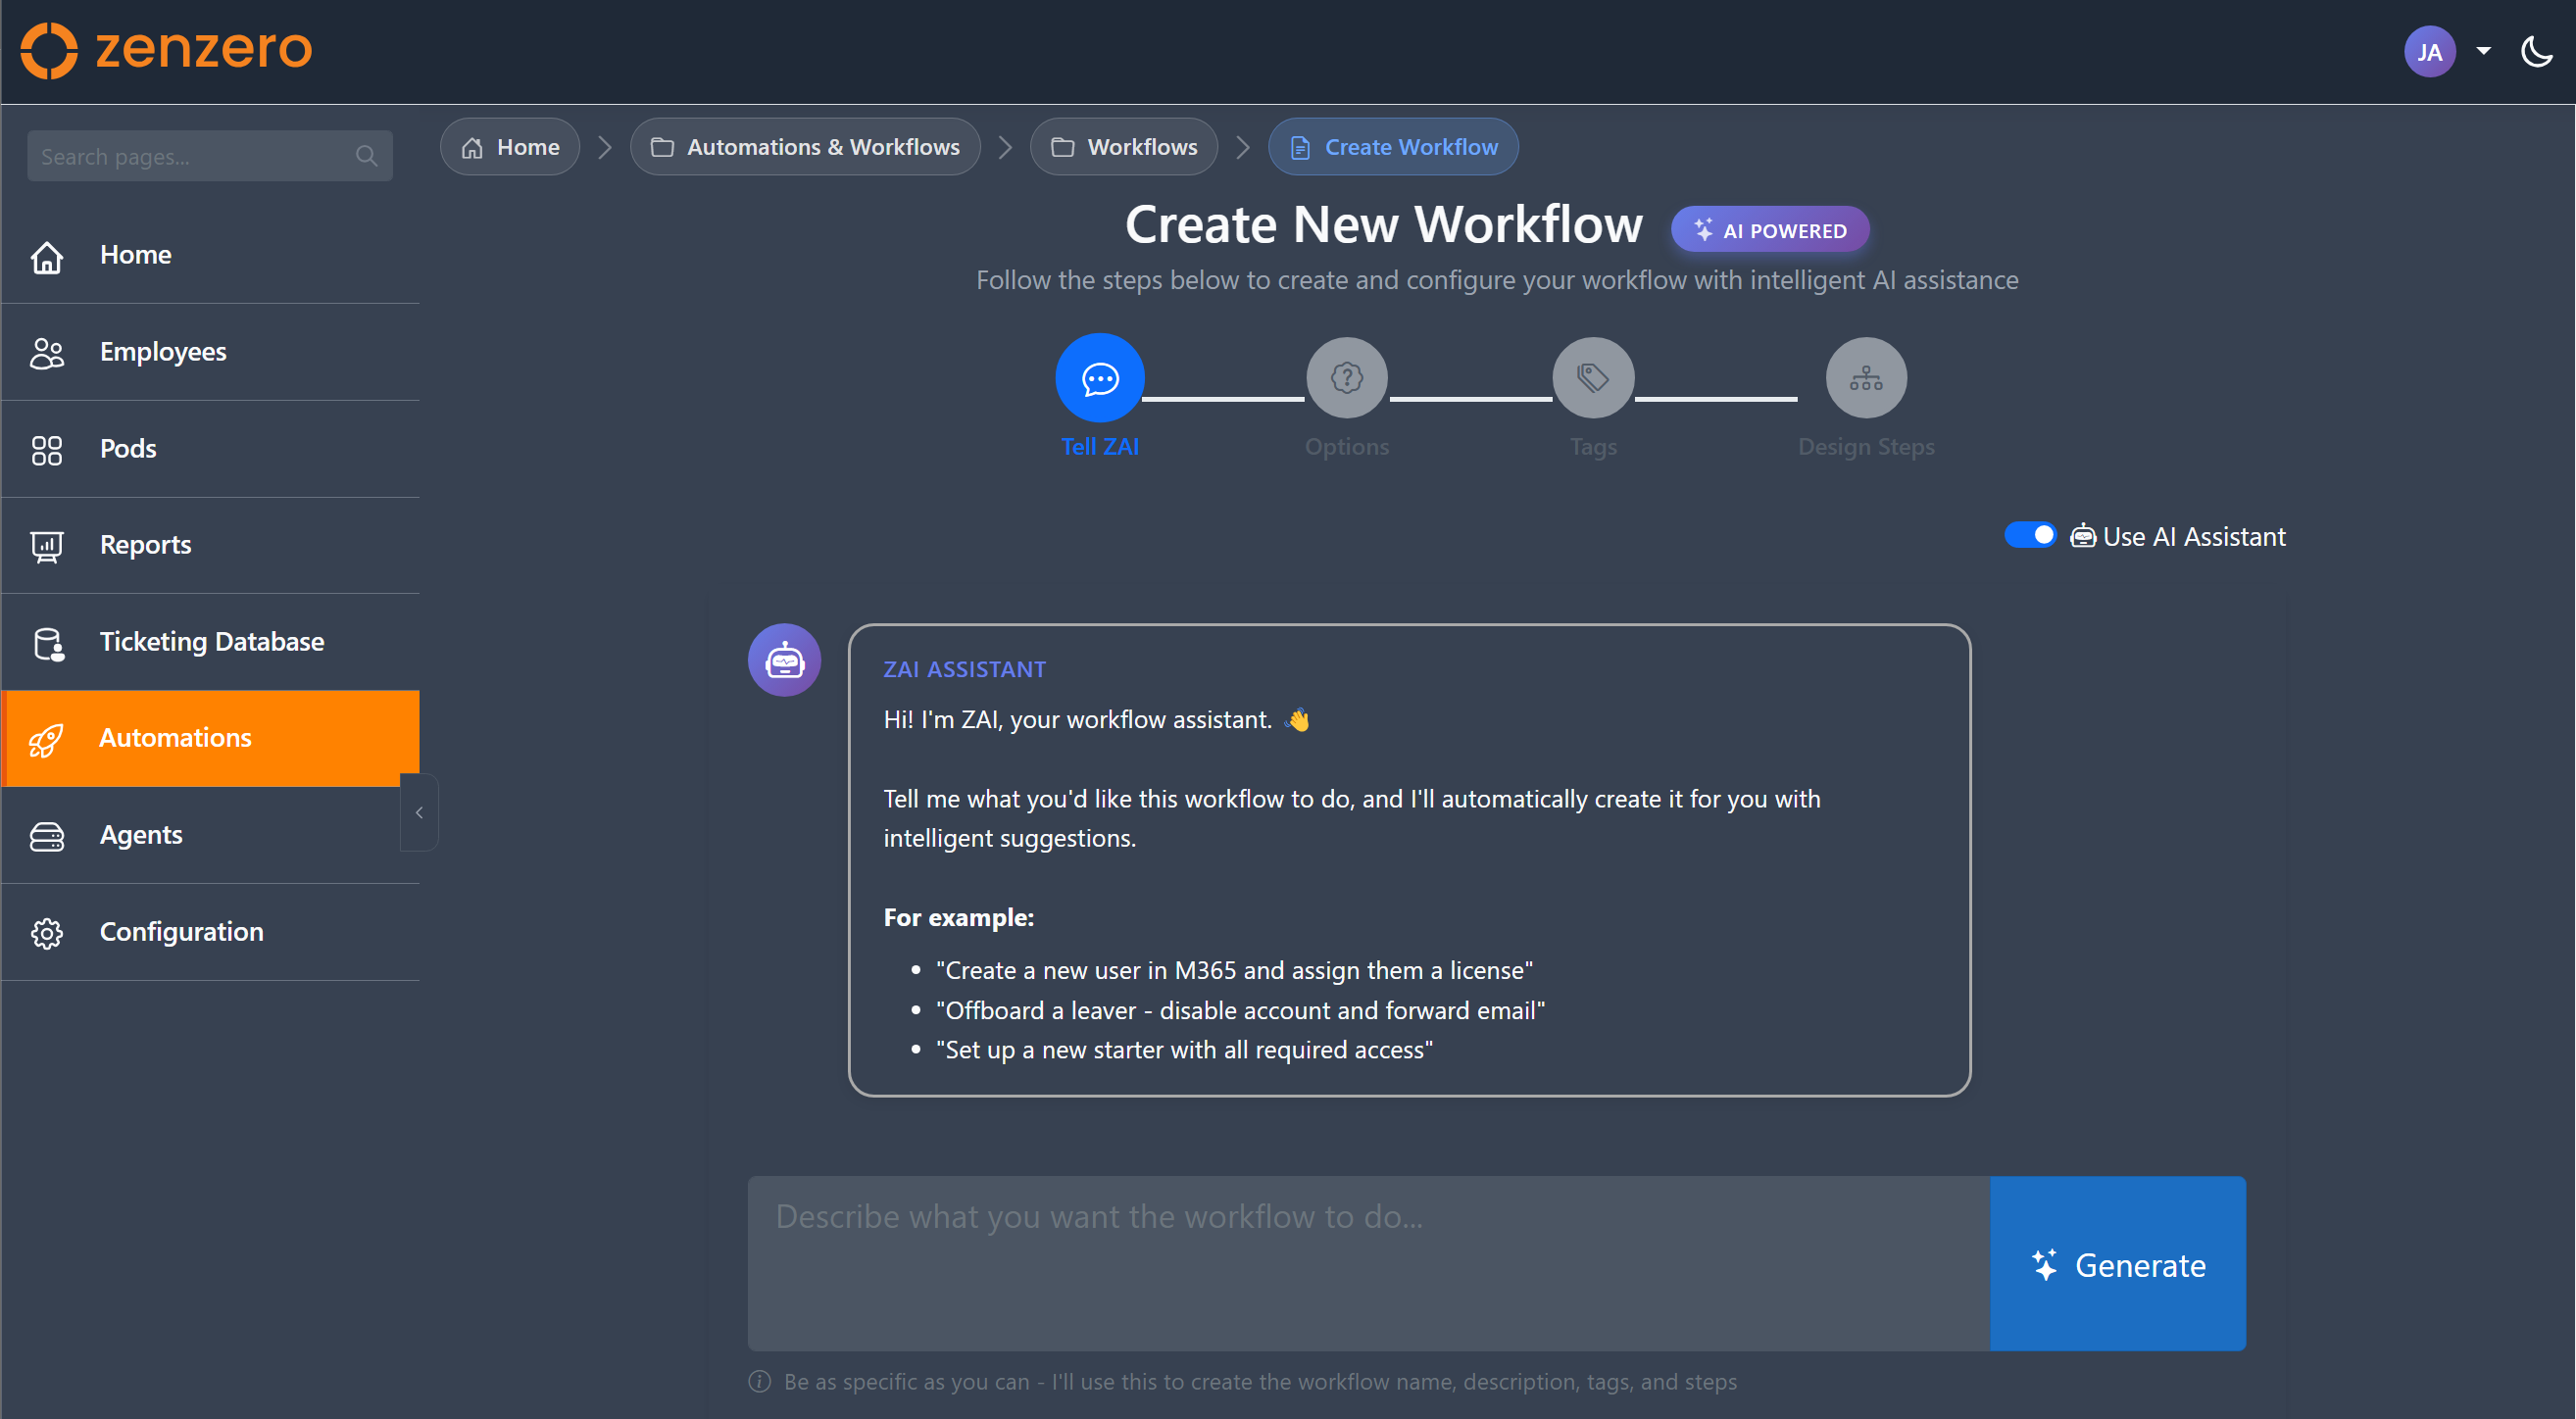
Prefer to skip the AI? Toggle AI Mode off and type the name and description yourself.
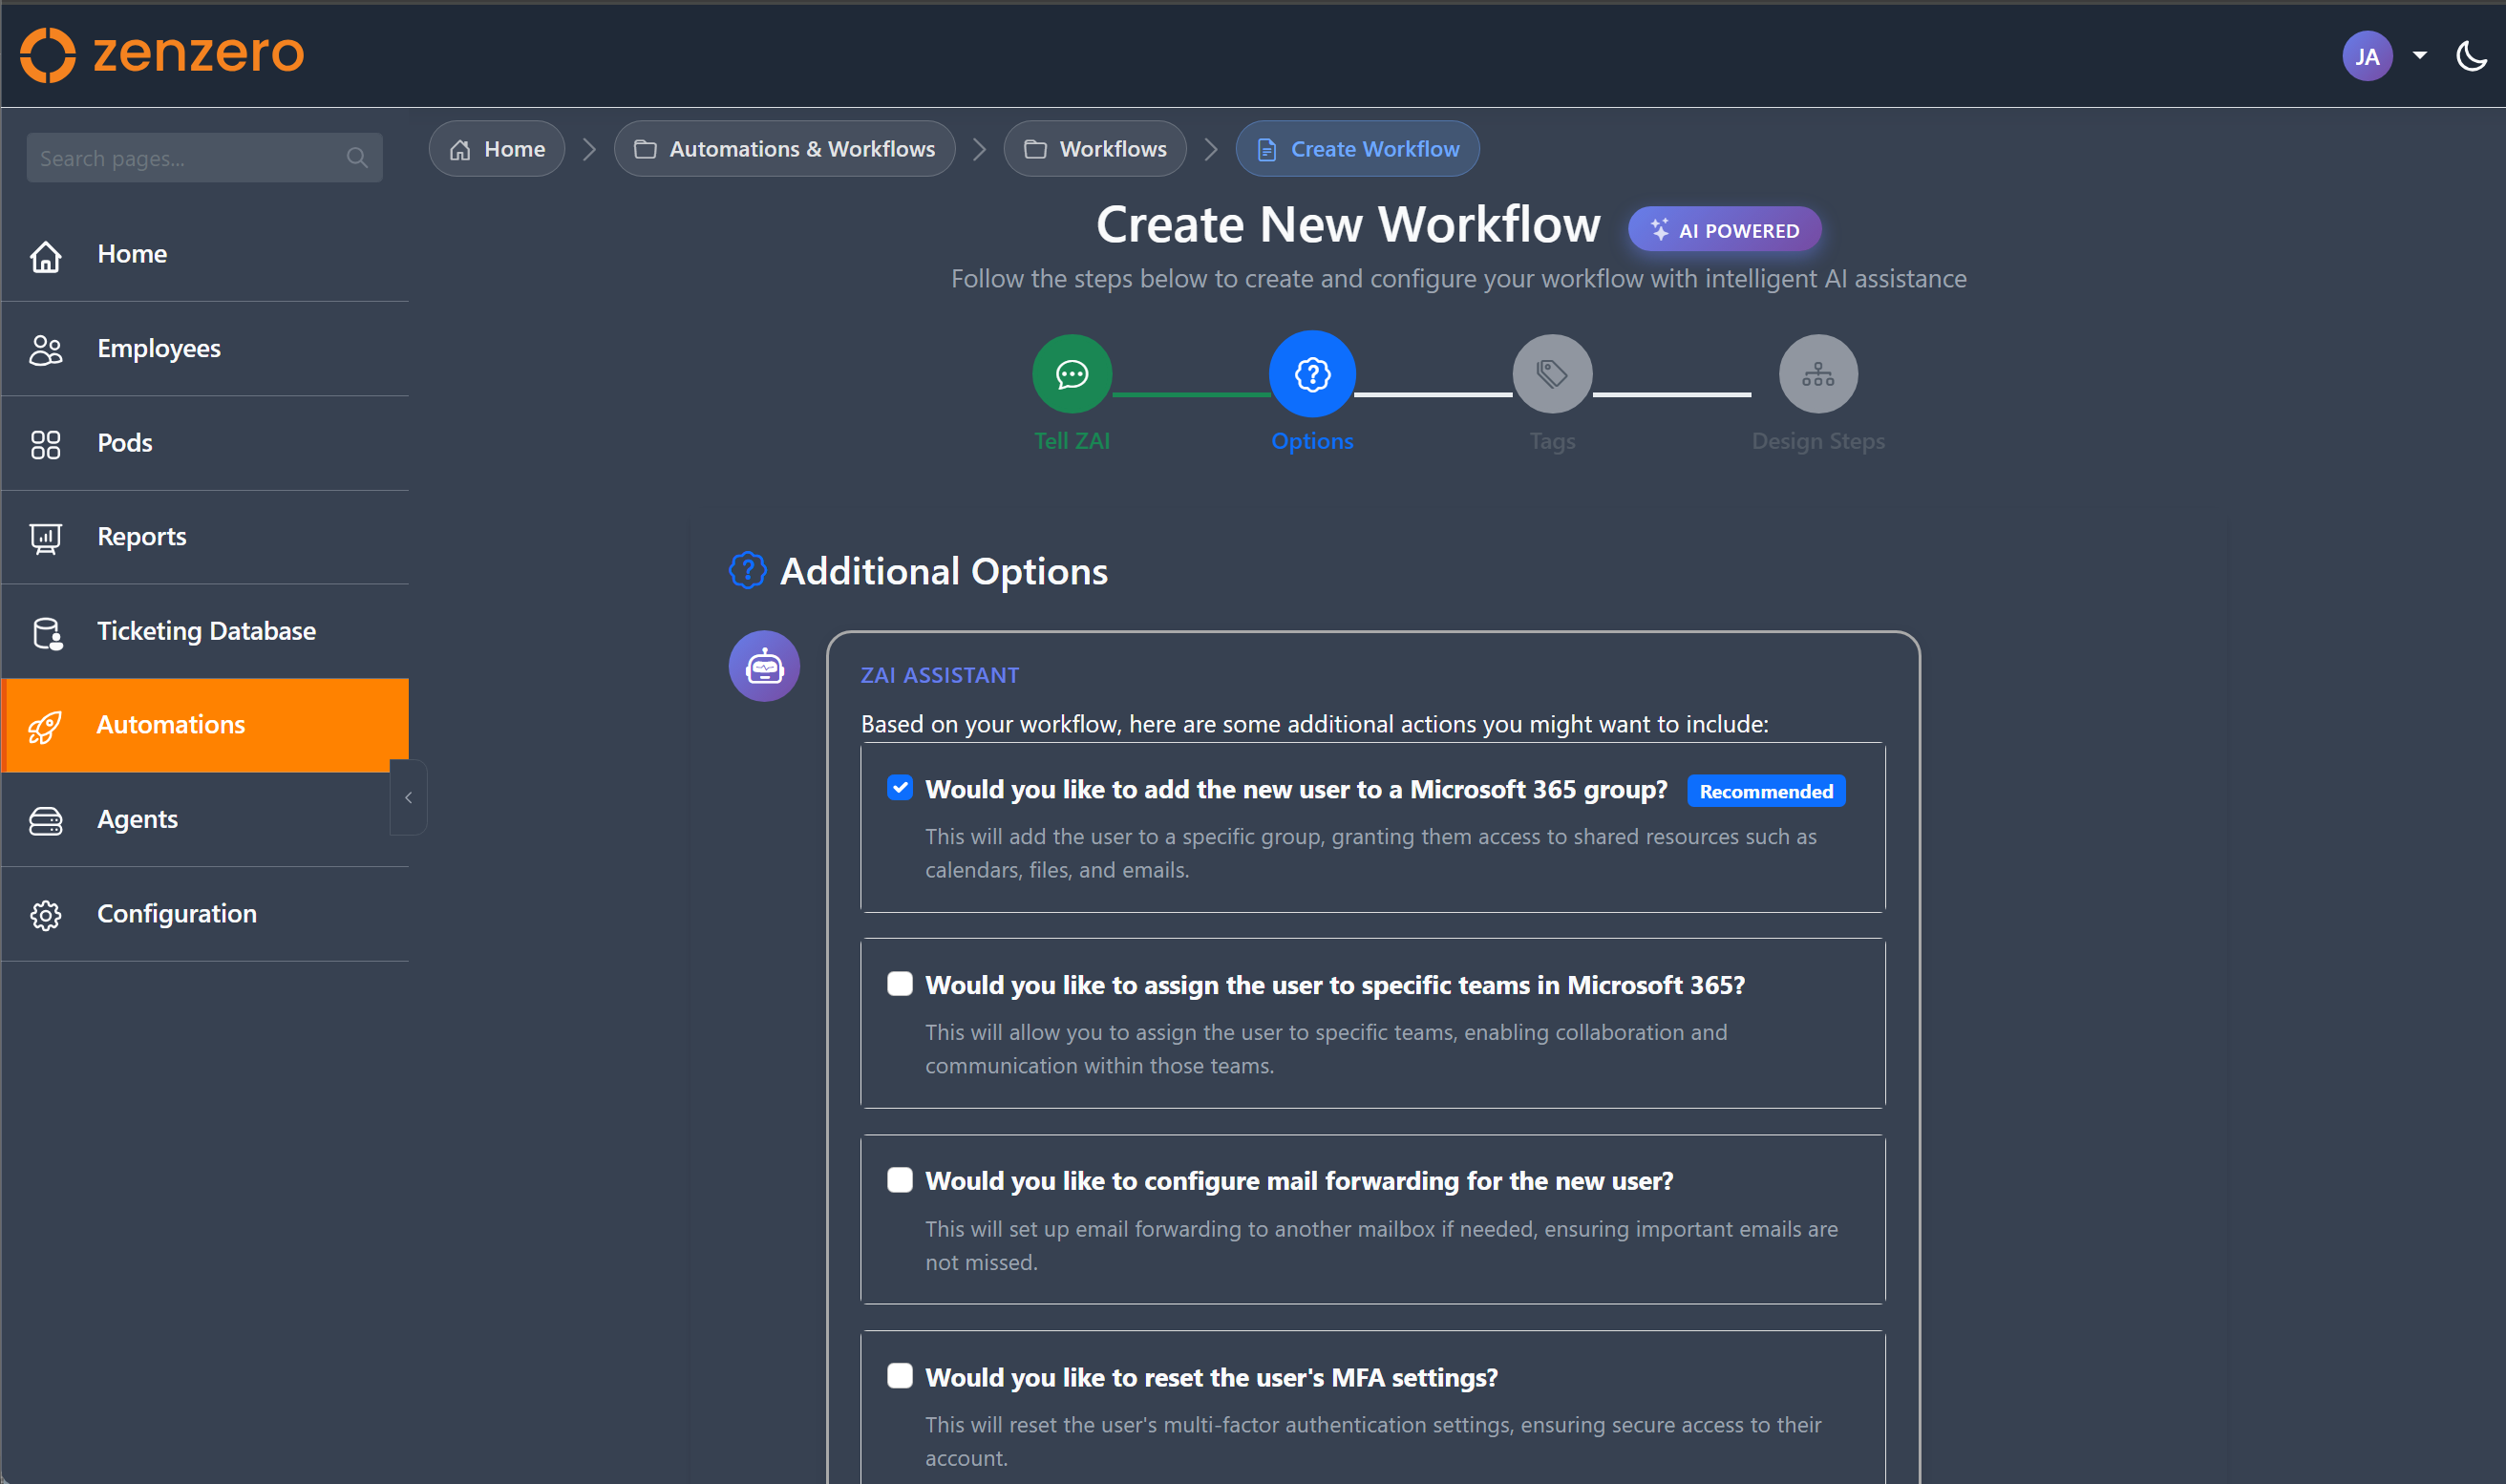
Pick the optional actions
ZAI may suggest extra actions based on what you described — things like "send a welcome email" or "add to a Teams channel". Each suggestion has a checkbox and a short explanation. Tick the ones you want.
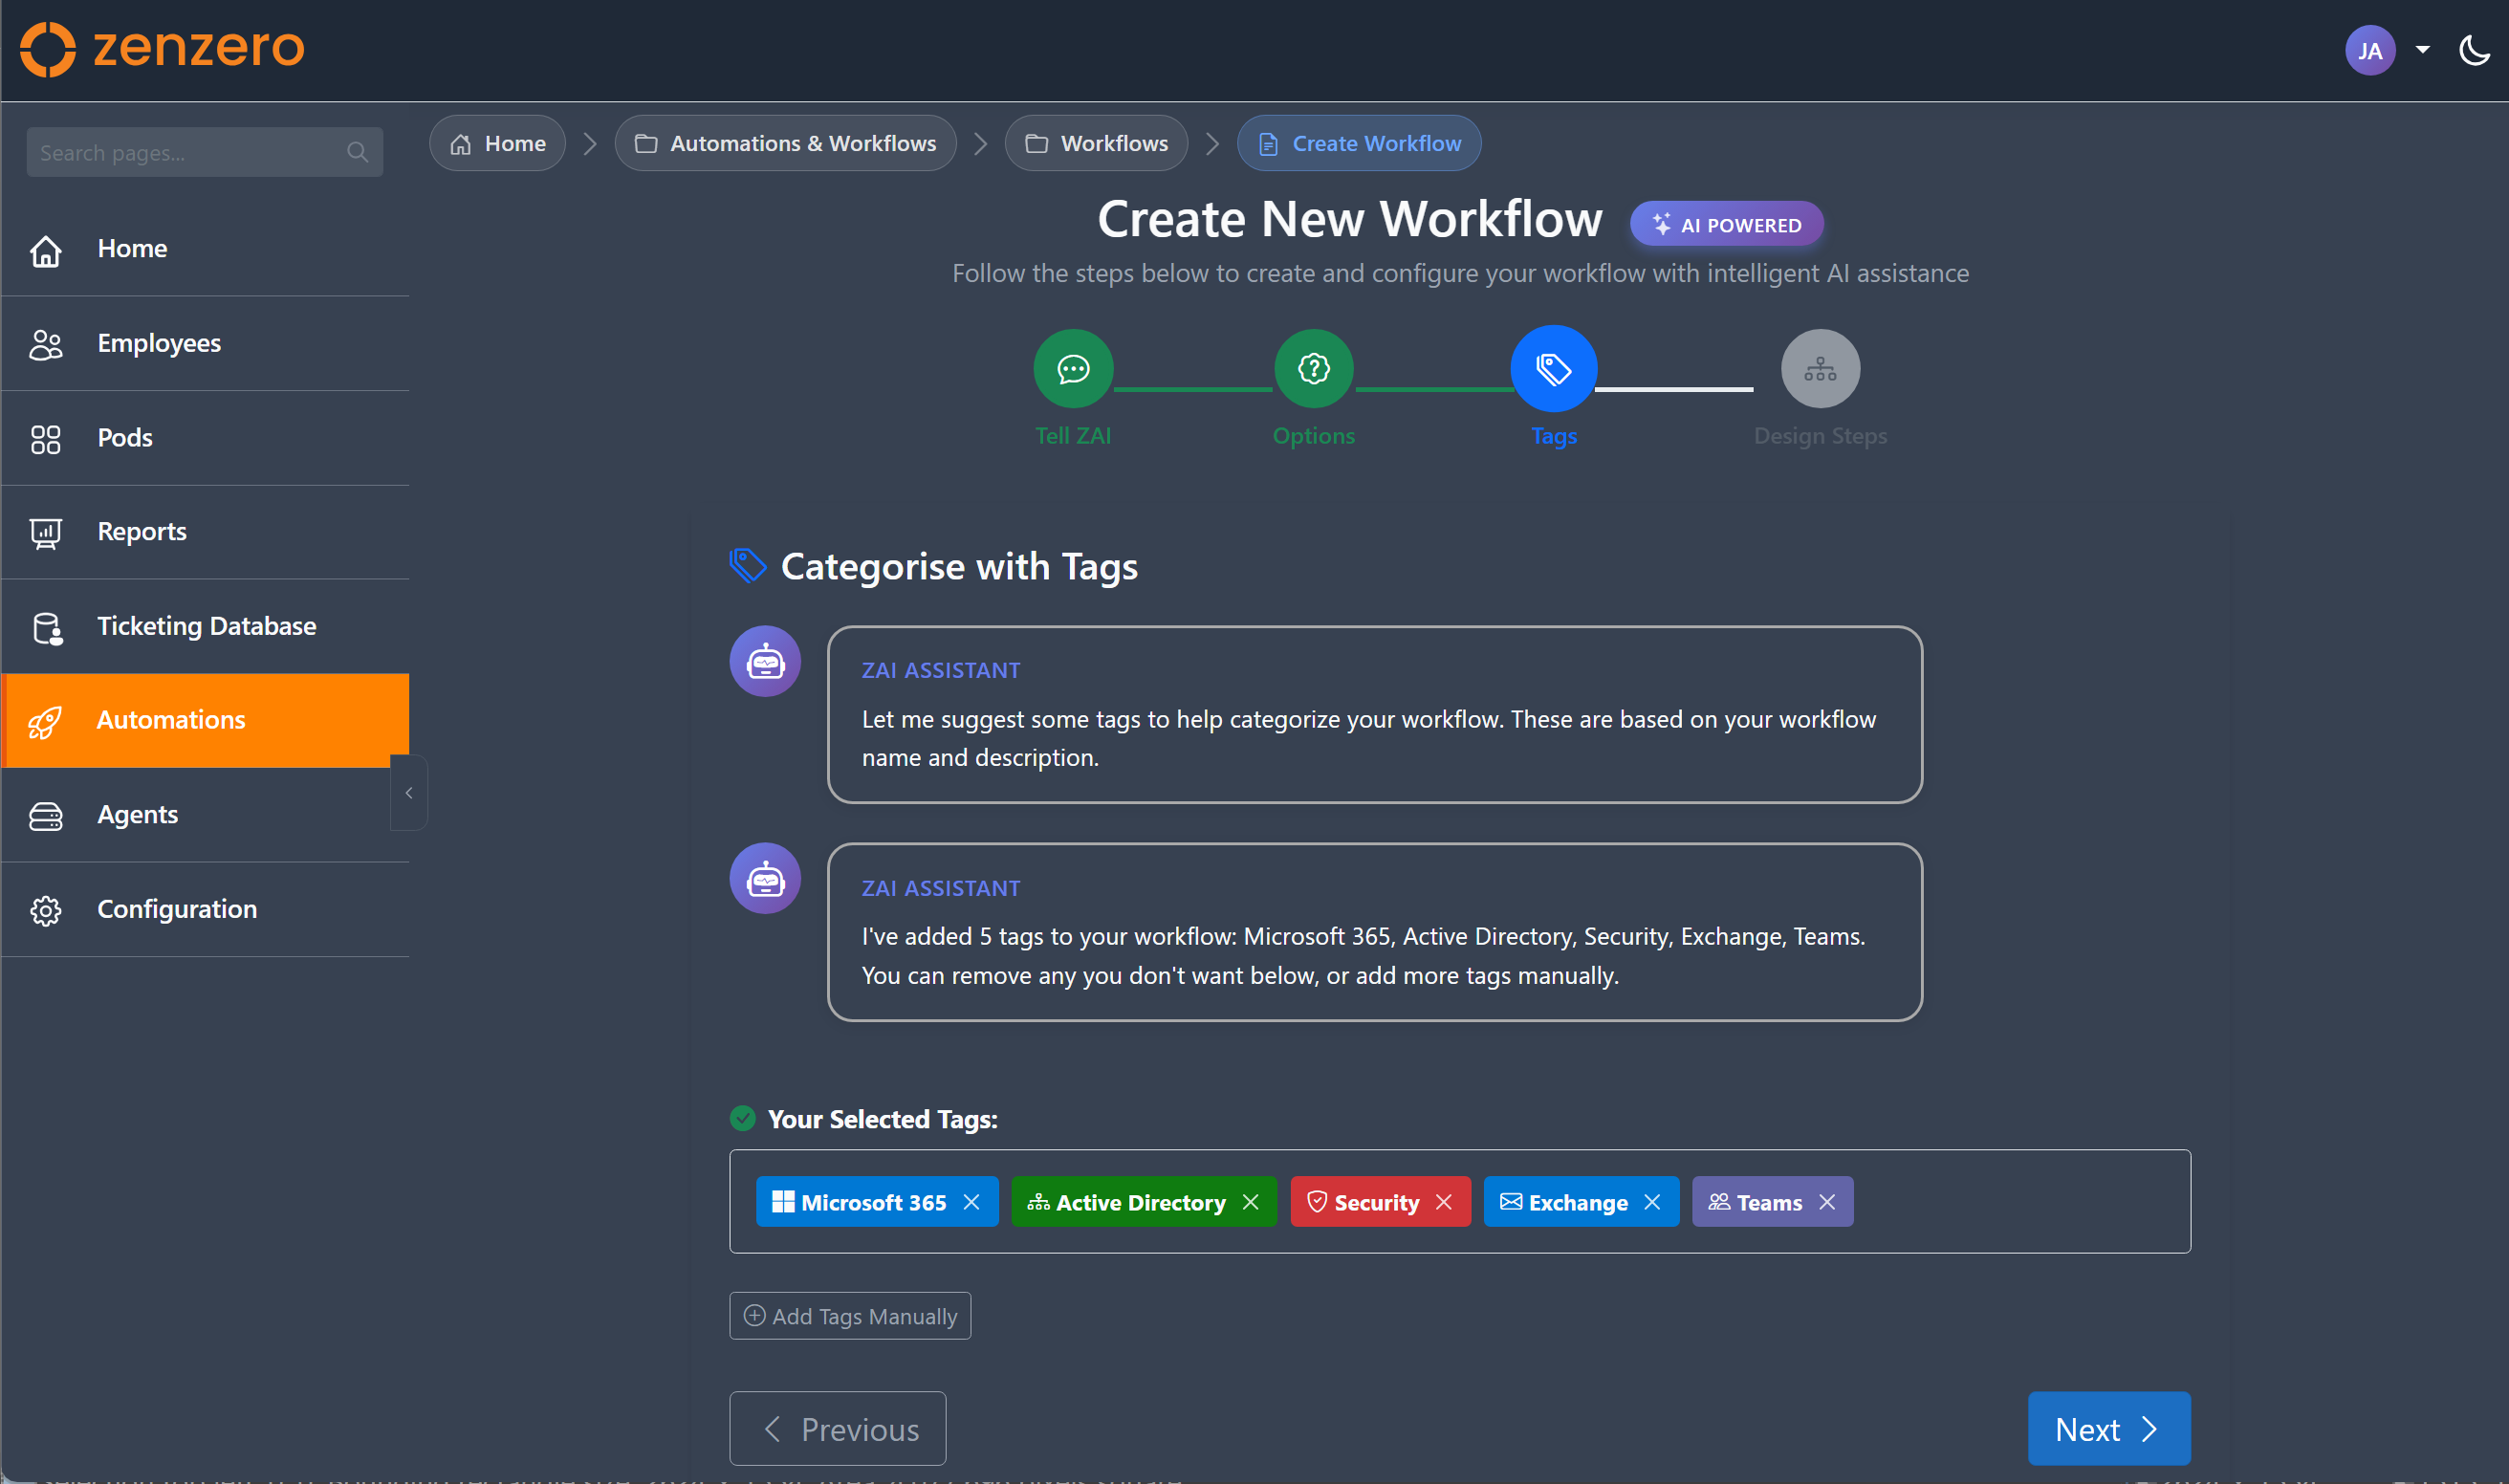
Tag the workflow
Tags make the workflow discoverable later. ZAI auto-suggests tags from your description — add or remove as you like.
Refine the steps on the canvas
The wizard opens the Workflow Designer with the suggested steps already laid out. From here you can add, remove, reorder, and configure each step's parameters.
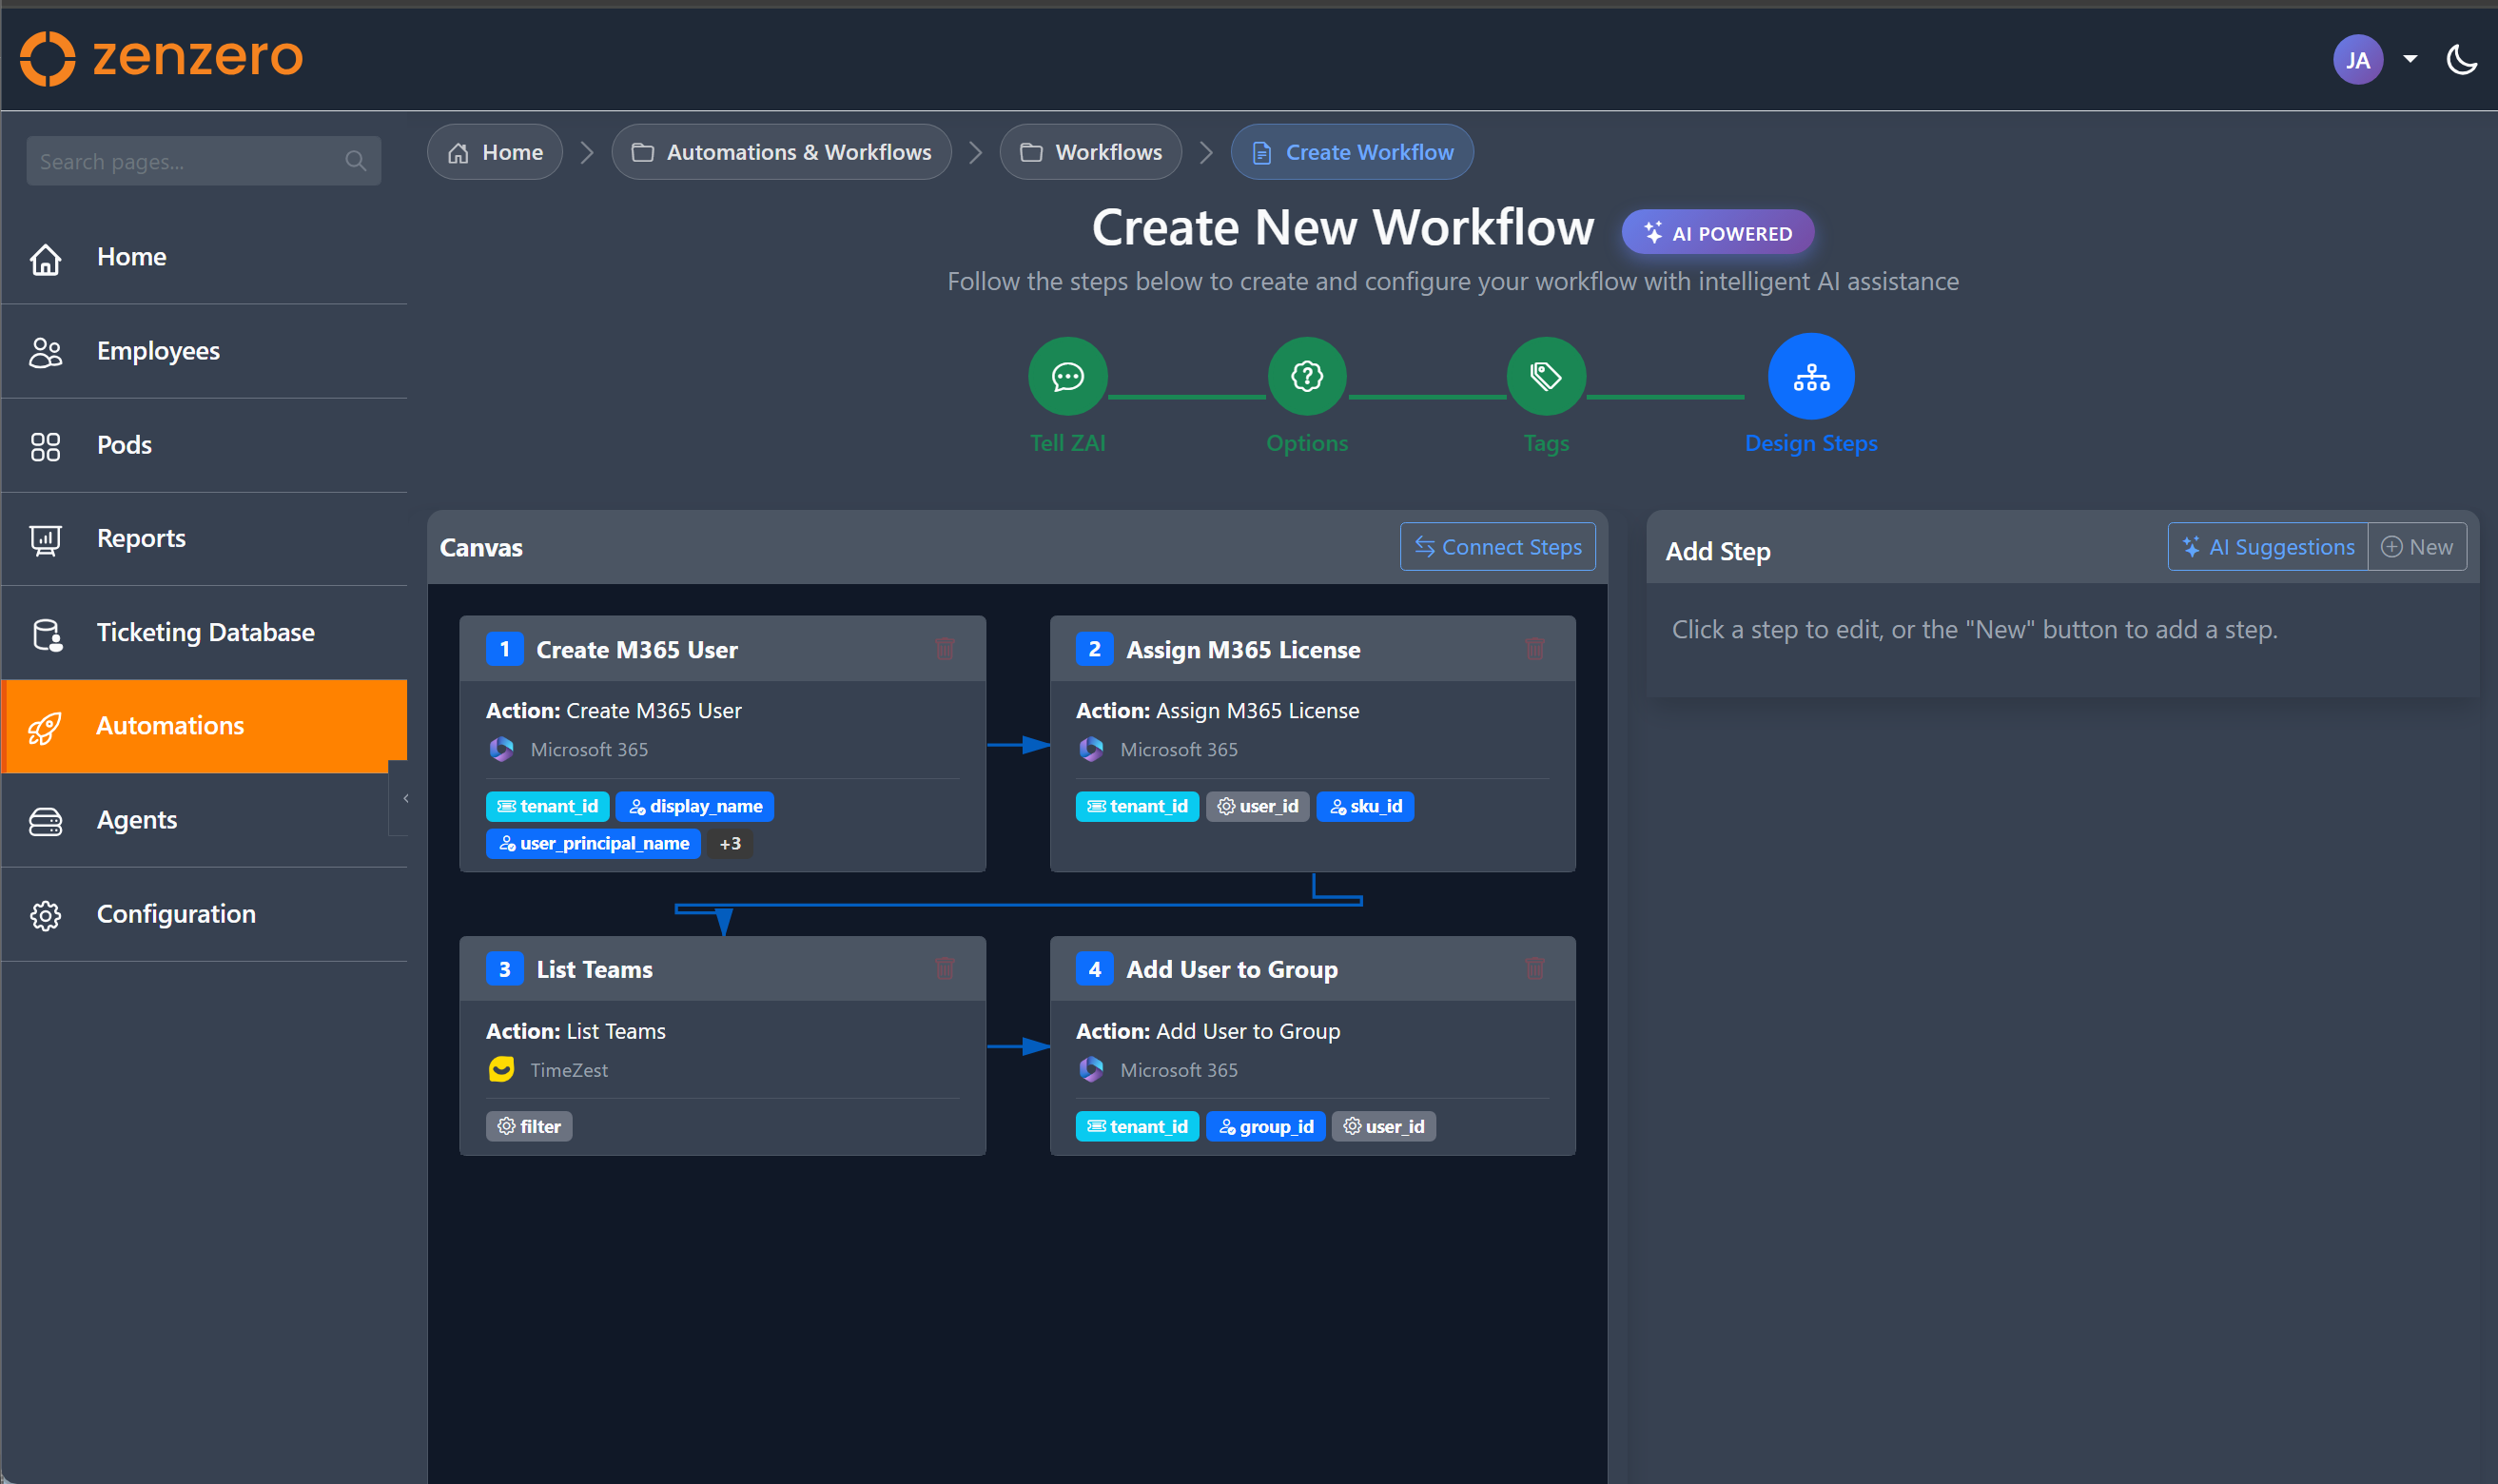
Click Finish when you're done. The workflow is saved as a Draft.
What happens after Finish
Your workflow goes through this lifecycle:
| State | What it means |
|---|---|
| Draft | Just created. Edit freely in the designer. |
| Submitted for review | Approvers are notified. See Review & approval. |
| Approved | Reviewers signed off. Ready to activate. |
| Active | Available for users to run from the ZAI Pod. |
| Changes requested | Reviewer asked for tweaks. Edit and resubmit. |
A new version snapshot is saved every time you save in the designer, so you can always roll back to a previous version.
Tips for good descriptions
ZAI's draft is only as good as your description. The more specific you are about systems, actions, and outcomes, the better the suggested steps.
- Good: "Create a new M365 user for onboarding. Assign an E3 licence, add them to All Staff, and send a welcome email with the temporary password."
- Poor: "Onboard a user."
Be specific about what systems (M365, ConnectWise), what actions (create, assign, add), and what success looks like.
Where to next
-
Workflow Designer
The visual canvas for steps and connections.
-
Review & approval
What happens after you submit a workflow for review.
-
Running a workflow
How users will trigger the workflow you just built.