Pod Manager Guide
This is a quick guide designed for pod managers. It includes a basics overview for using the ZAI portal pod section.
Basic Overview Of The Pod Section
Upon opening the pod section, you will see a table showing all the current pods, to view a pod click the eye icon at the end of the row, this also has 2 buttons located above the table. These two buttons allow you to either create a new pod or onboard an already existing pod. Located above this, is a search section with an advanced search option as well.
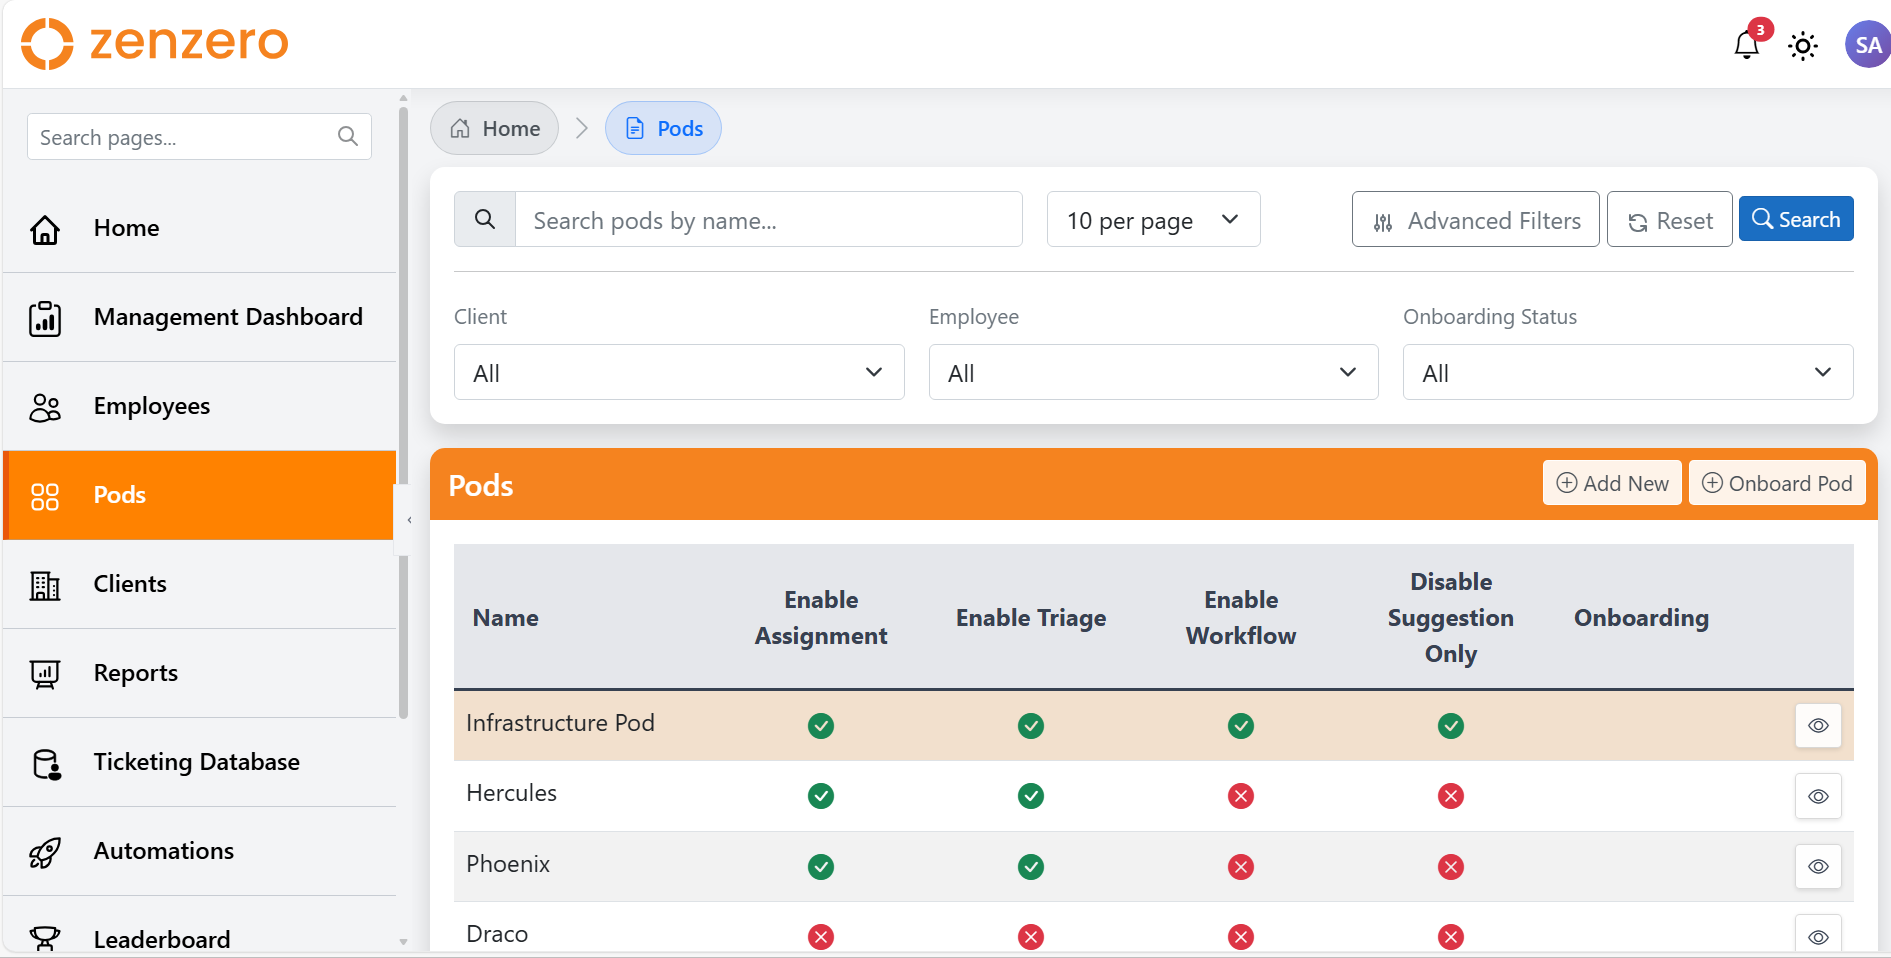 Screenshot: pod page overview
-
Direct Link - ZenZero Portal
Creating A New Pod
Step by Step
-
Firstly click on the "Add New" button on the pod page
-
After doing this you will be brought to the page below
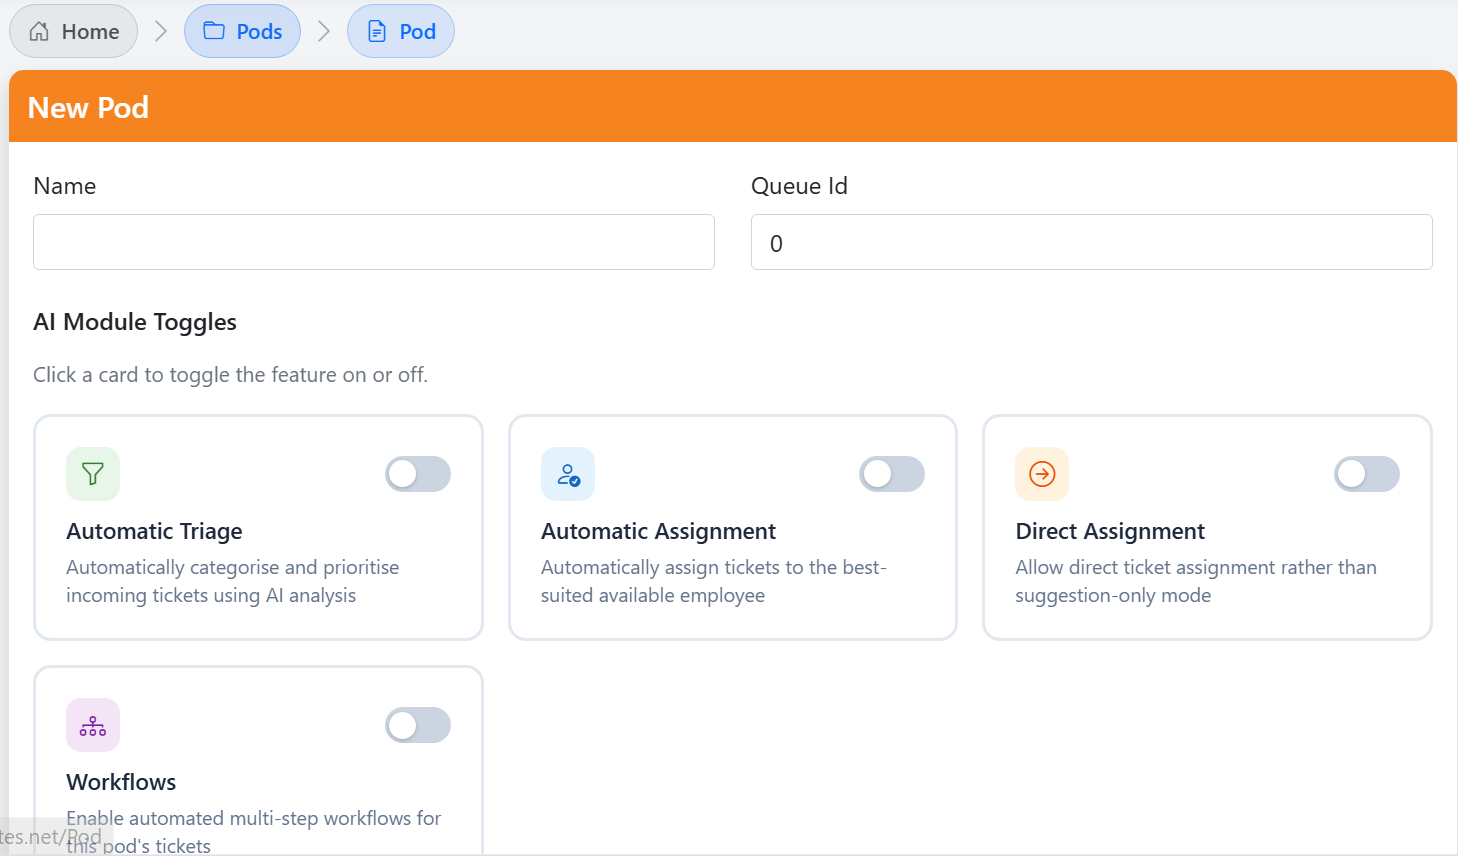 Screenshot: Add new pod page
-
Enter the desired pod name and queue id, (the queue id is where your pods tickets come to)
-
From there you can pick which AI modules you would like to use, these include:
- Automatic Triage: Auto catagorises and prioritises tickets
- Automatic Assignment: Auto assigns tickets to the best suited and available employee
- Direct Assignment: Allows direct ticket assignment compared to suggestion only
- Workflows: Enables automated multi step workflows for your pods tickets
-
Now just click create and your pod is made
-
Direct Link - Adding A New Pod
Onboarding A Pod
Step By Step
- First, click the "Onboard Pod" button, this will take you to the Onboard New Pod page,
-
From here add the new pods name and queue id, click continue,
-
Now it will ask you to either skip or choose AI Modules, these are:
- Automatic Triage: Auto catagorises and prioritises tickets
- Automatic Assignment: Auto assigns tickets to the best suited and available employee
- Direct Assignment: Allows direct ticket assignment compared to suggestion only
- Workflows: Enables automated multi step workflows for your pods tickets
-
Upon clicking continue, it will take you to the client page, select the clients you need to add to your pod
-
The next step is selecting the employees you need to assign to your pod, also on this page you will select the job roles associated with the pod
-
Next you can select board configurations, where you configure which ConnectWise service board the pod handels, this step is optional
-
The last step is to review the data you have entered and confirm this is all correct, then you can click onboard pod
-
Direct Link - Onboarding A New Pod