Running a workflow
Running a workflow takes about thirty seconds. You pick the workflow, review what it's going to do, approve, and watch it run.
Five steps end-to-end
Open the menu
Type /run in the ZAI Pod chat. A dropdown shows every workflow you can trigger.
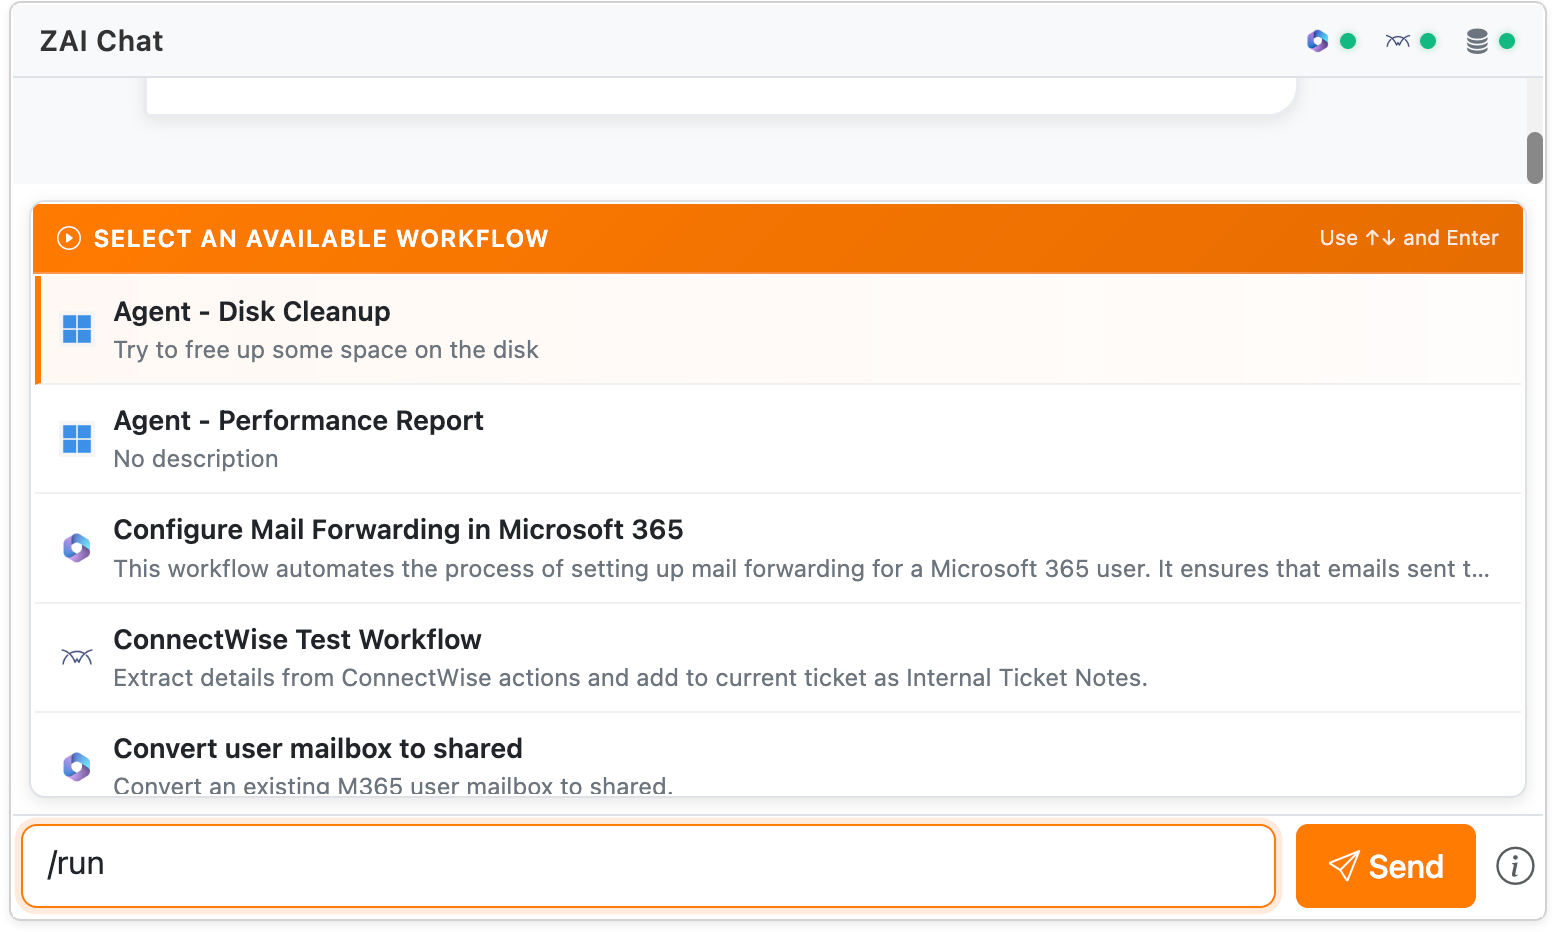
Type more to filter — /run password only shows password-related workflows.
Pick a workflow
Use the arrow keys to highlight one, then press Enter (or click). An approval card appears.
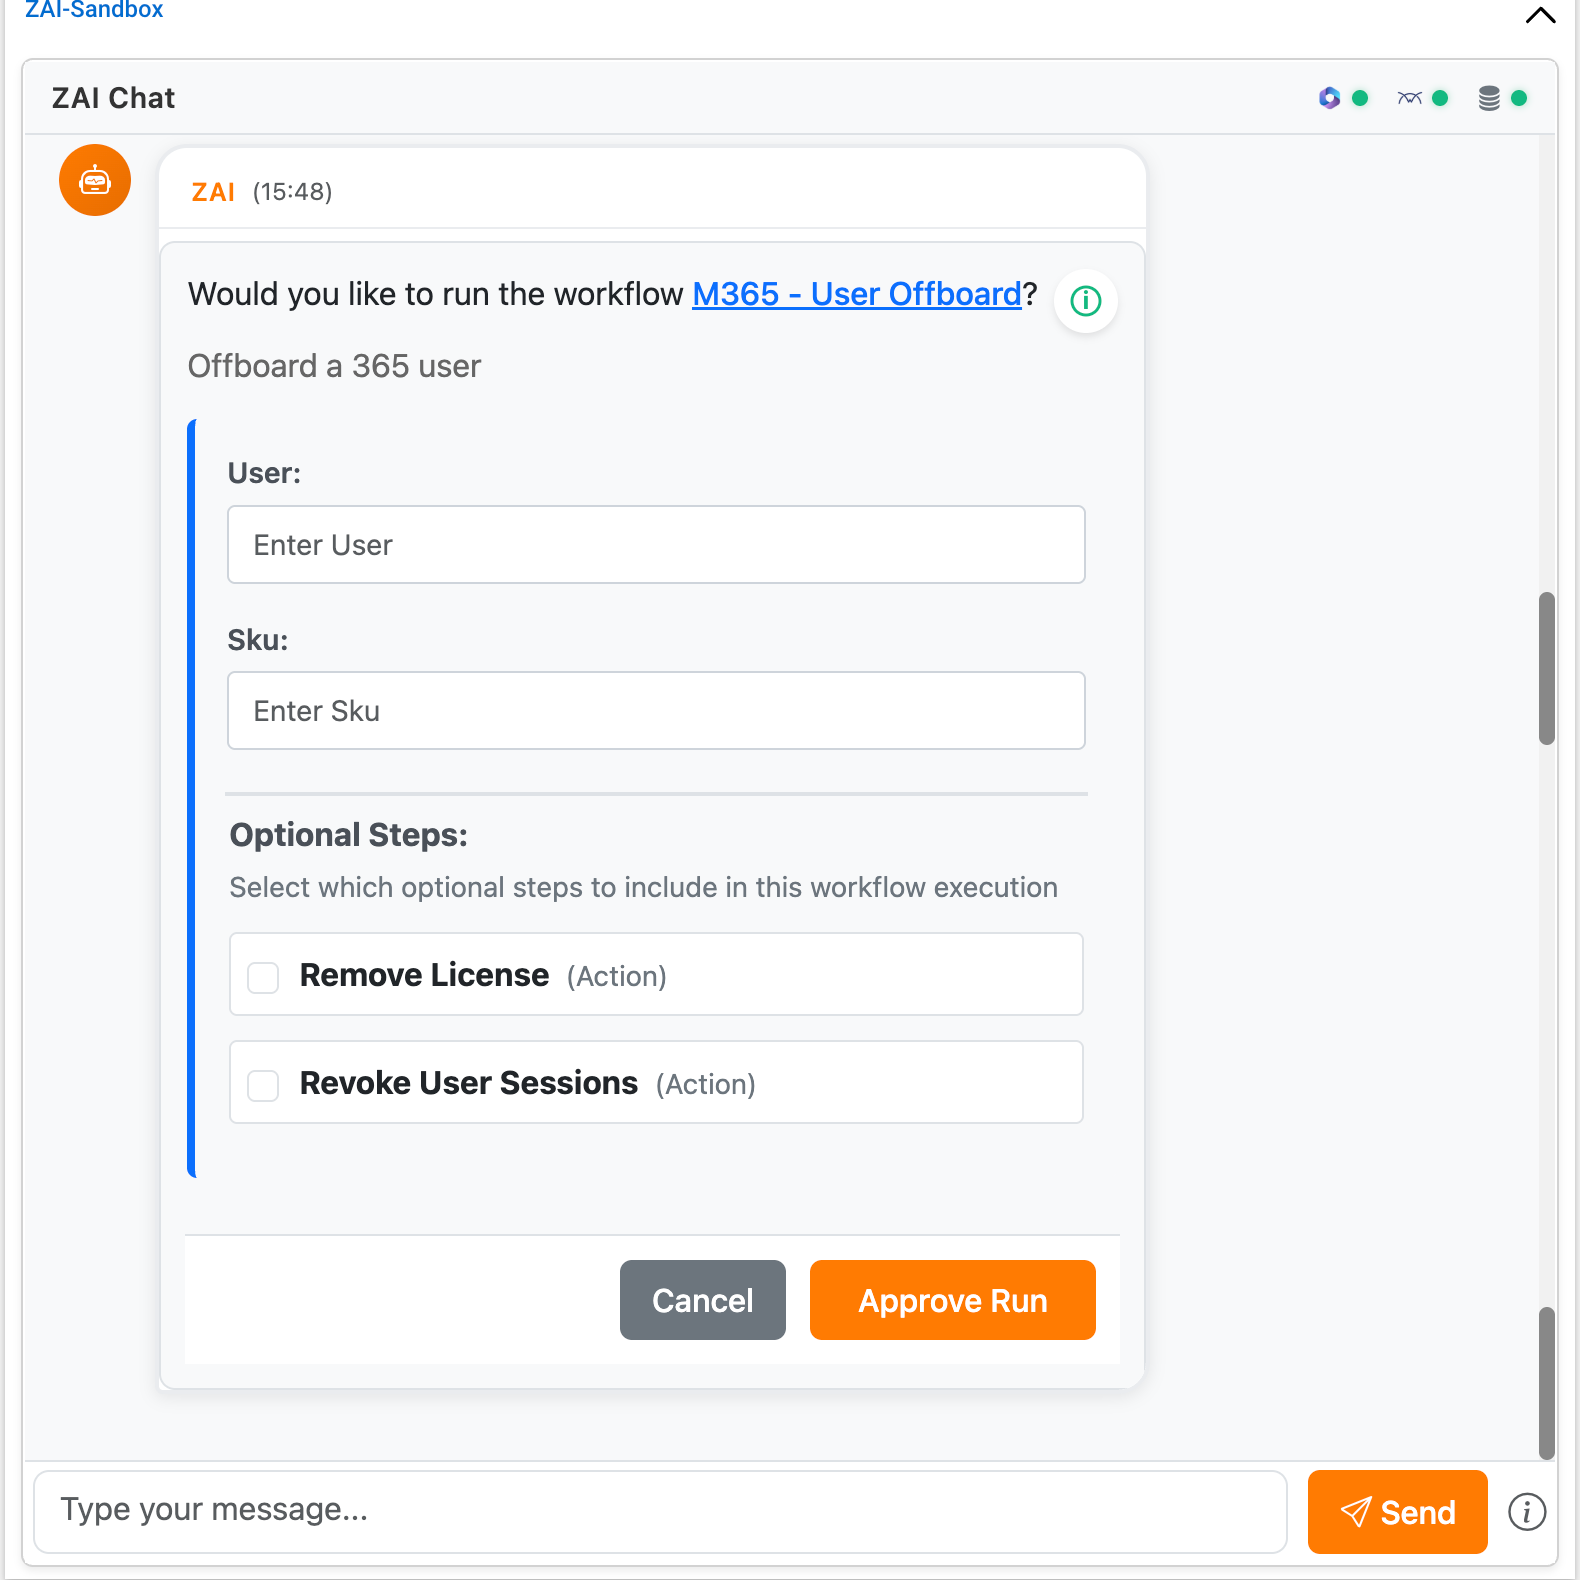
Fill in what's needed
The card has two kinds of fields:
- Context fields — already filled in from the ticket (tenant, client, ticket ID). You can't edit these.
- Runtime fields — values you provide. Text boxes, dropdowns, and checkboxes.
Required fields are marked. Optional steps appear as checkboxes — tick them to include, leave unticked to skip.
Click Approve & Run
The workflow starts. Each step shows live status as it runs — no need to refresh.
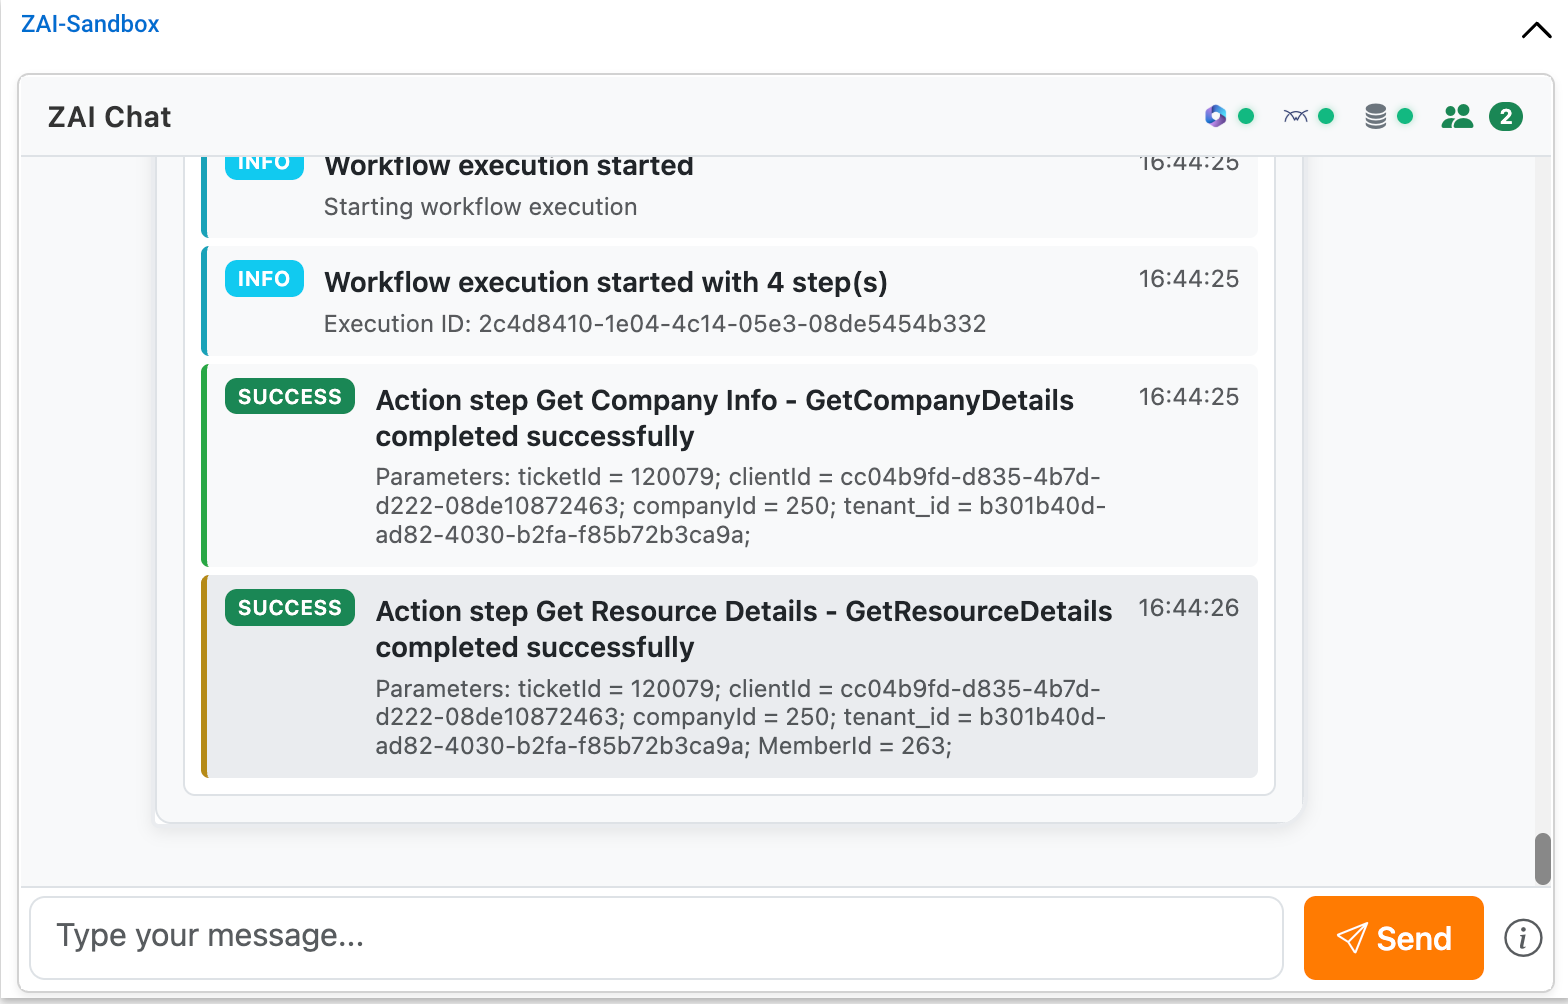
Step status at a glance
| Icon | Meaning |
|---|---|
| Pending | Waiting to start |
| Running | Currently executing |
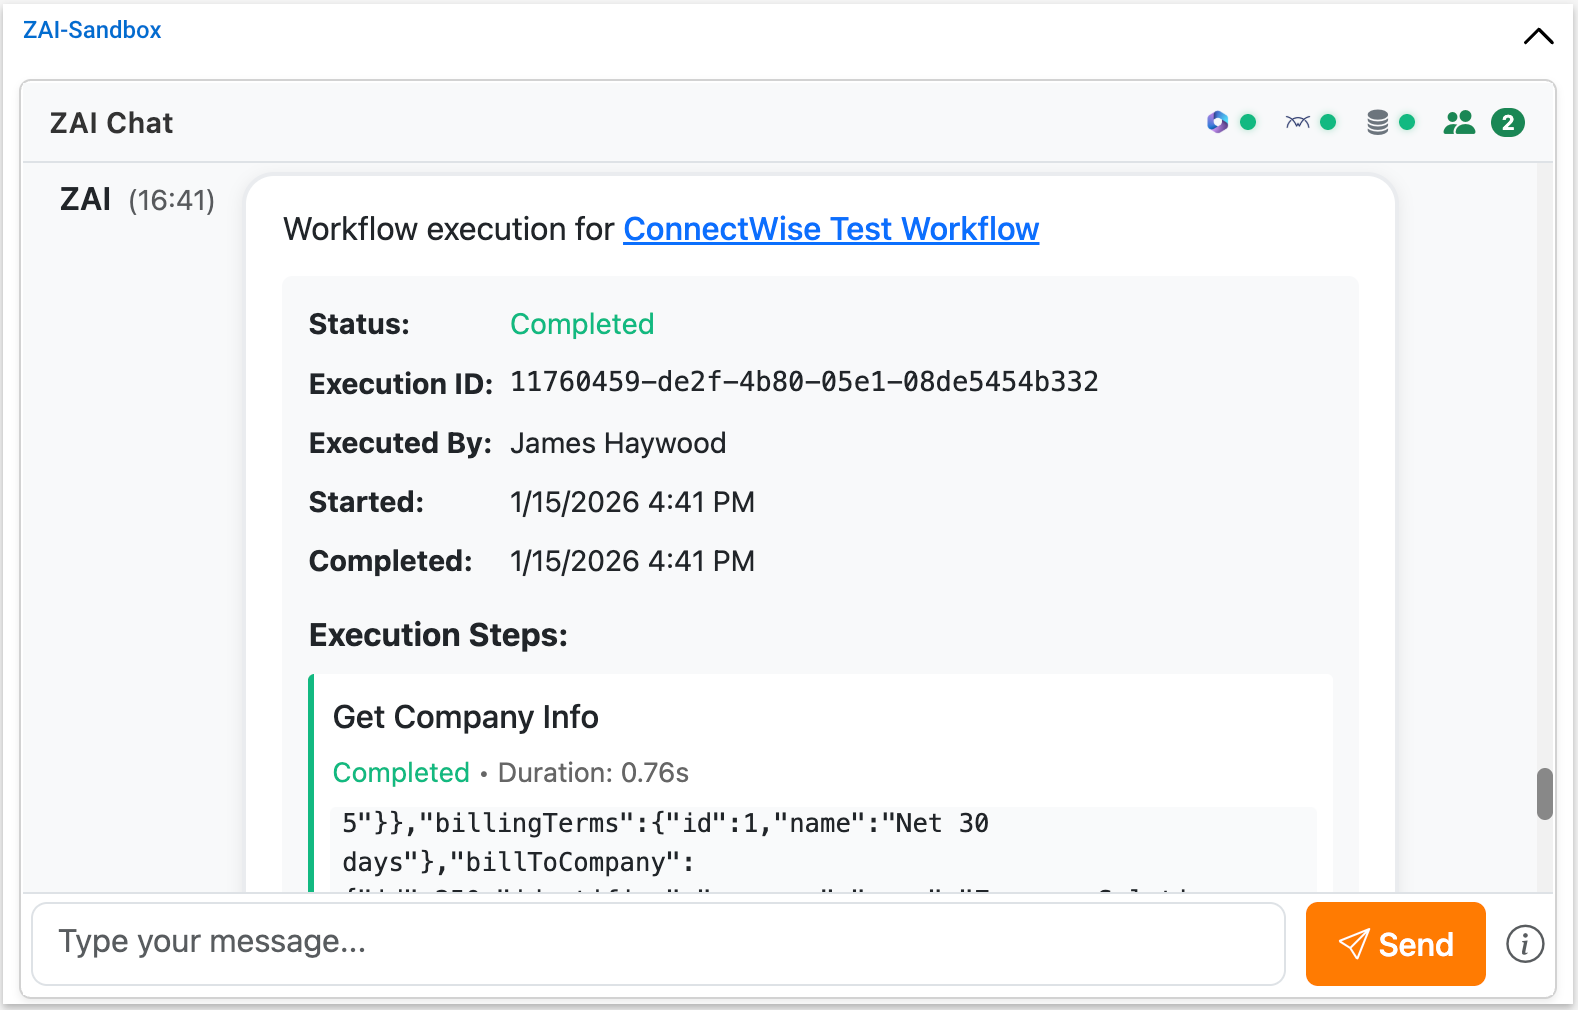
| Completed | Finished successfully |
| Failed | Hit an error — see the message on the step |
If something goes wrong
- Can't find a workflow. Try a different search term, or ask your admin whether it's enabled for your role.
- A step fails. Read the error on the step. Earlier steps that succeeded stay completed — the workflow stops where it broke.
- A step seems stuck. Some actions take 30+ seconds. Don't refresh — the workflow is still running.
Where to next
-
Common workflows
The workflows you'll run most often.
-
Workflow history
Find a past run and see what it did.
-
Chat interface
Other things you can do in the ZAI Pod beyond workflows.